

How To Make A Blog In Gmail
Let's consider a hypothetical scenario. You log in to your Gmail account and you find 17,758 unread emails. You tremble and break out in a cold sweat. If you find yourself doing this often, don't fret because you aren't alone.
A study conducted by the University of Loughborough wherein researchers followed a group of 30 government employees in the UK found that 83 percent became more stressed while using email. Furthermore, their stress levels, analyzed by saliva samples as well as heart rate and blood pressure monitors over a 24-hour period, peaked at points in the day when their inboxes were fullest, the study found. Interestingly, the study also found that emails that were irrelevant, which interrupted work or demanded an immediate response was particularly taxing, while those which arrived in response to completed work had a calming effect.
Not using email isn't an option, so the only other option is to manage emails better. Decluttering and organizing your inbox is a great idea, it still requires a considerable amount of time and effort. However, if you use Gmail, a simpler alternative is to set up labels and filters to manage your Gmail inbox better.
We've written about Gmail labels earlier, so in this blog post, we'll focus on how to use Gmail filters to sort your emails automatically.
Table of Contents
- So, what are Gmail filters?
- How do you create a filter in Gmail?
- Actions that can be performed using Gmail filters
- Editing or deleting filters
- Advanced filter actions
- Must-have Gmail filters
So, what are Gmail filters?
Filters in Gmail are automation rules that allow you to redirect emails as they hit your inbox, thereby saving you the trouble of having to sort and manage emails manually.
For instance, you can redirect certain newsletters from certain senders into a separate inbox, or directly send emails from certain sources to the trash. In Gmail, you can even use filters to add importance markers and labels of different types and colors. By weeding out emails this way, you can free up space, reduce stress levels, and focus on the conversations that really matter.
How do you create a filter in Gmail?
There are two ways of creating filters in Gmail.
Using the search bar

Go to the Gmail search bar, type in a keyword or email address you'd like to filter out and click on the gray triangle.
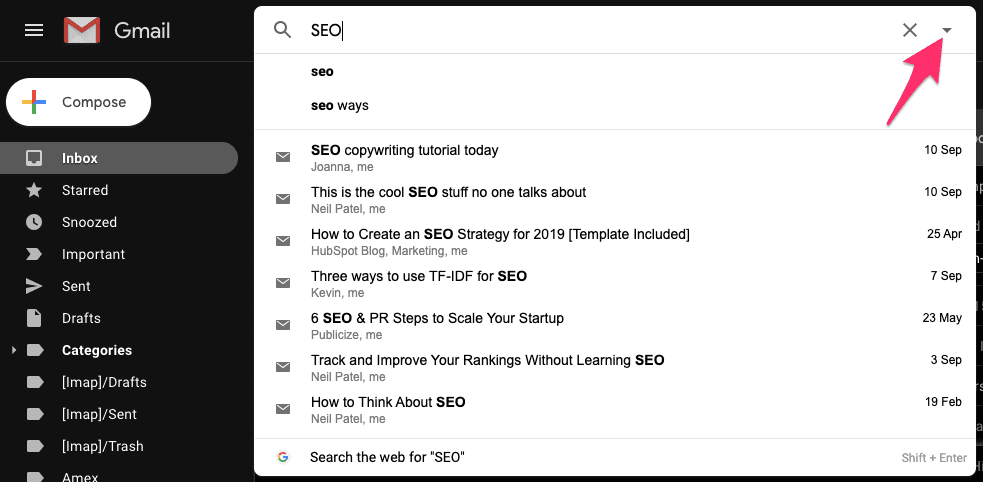
Clicking on the gray rectangle opens up a dropdown. This dropdown allows you to further refine your filter conditions. Once you've done that, click on the "create filter" option.
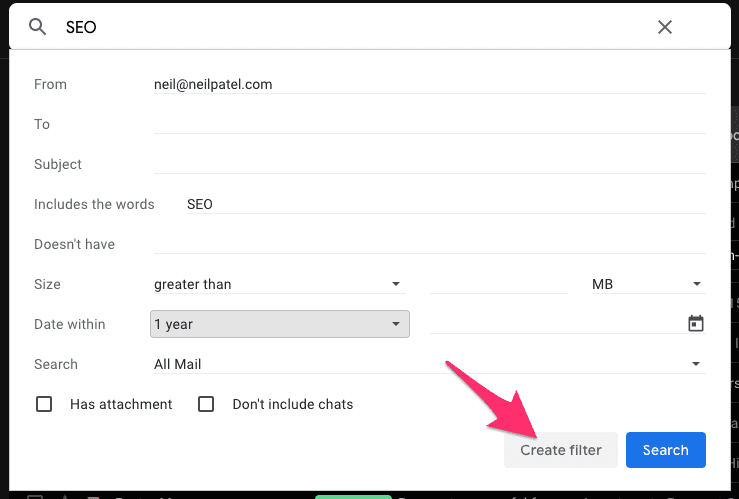
You can now choose what you want this filter to do. For instance, in this case, I'd like to have all emails that contain the keyword "SEO" and are from the email address [email protected] to go into my Updates folder instead of my primary inbox.
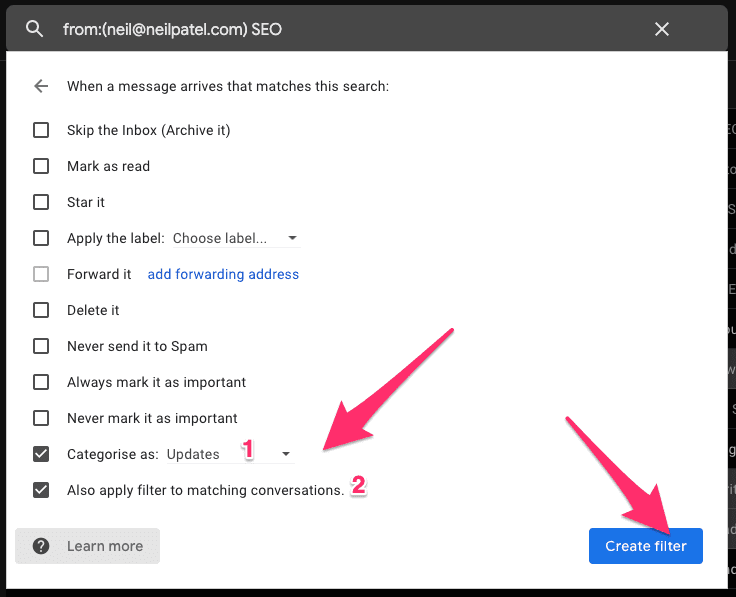
Clicking on the "Create filter" button will now create the said filter and all emails which contain the keyword "SEO" and are from the email address [email protected] will now appear in my "Updates" folder instead of my primary inbox.
Pro tip: Remember to click on the "Also apply filter to matching conversations" checkbox. This way, all your pre-existing emails that match the filter conditions will also be included within the filter conditions.
With this, you have created your first Gmail filter and are on your way to achieving email nirvana.
Click on the 'gear icon' on the top right of your Gmail screen.
Pick 'settings' from the dropdown.
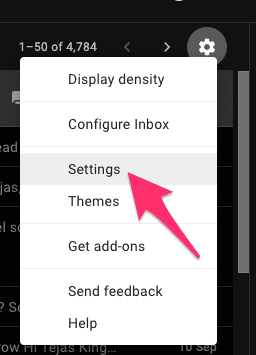
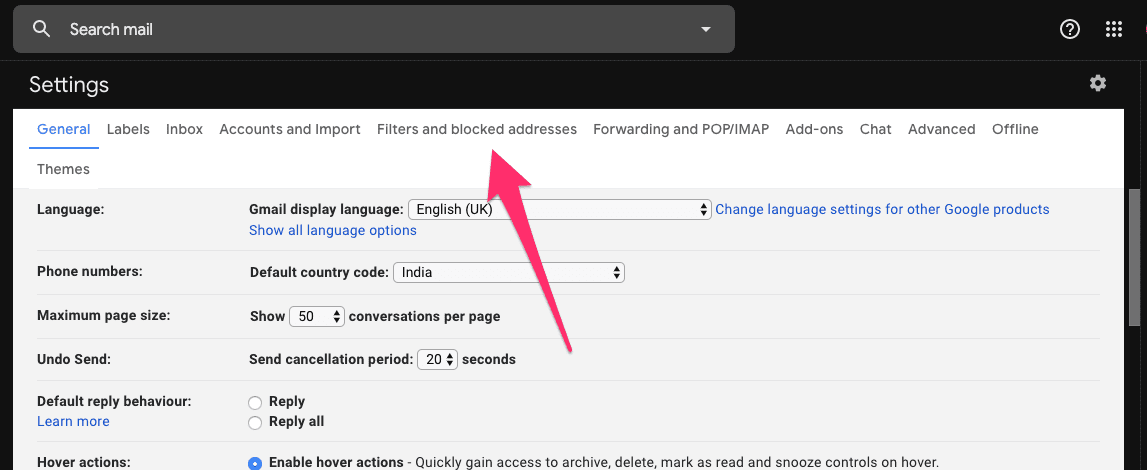
And then click on 'filters and blocked addresses.' This section shows you the existing Gmail filters which are applied to your Google account.
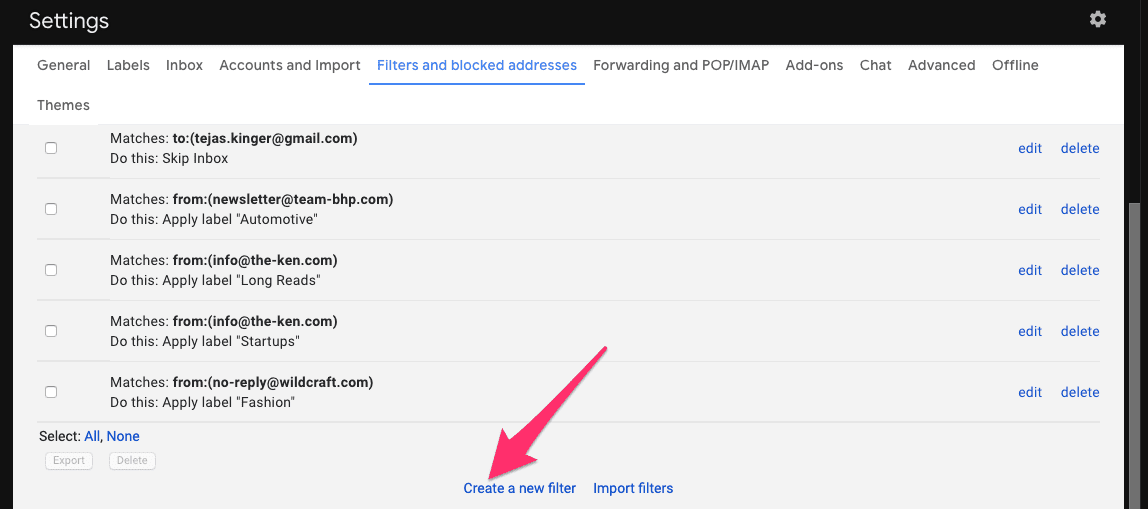
To create a new filter, click on the "Create a new filter" option.
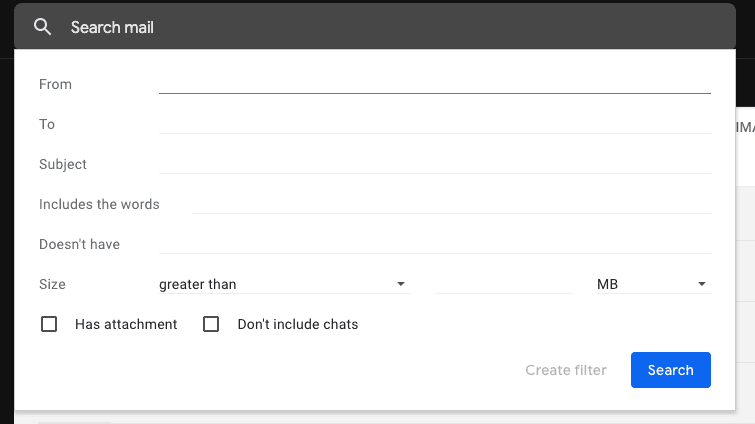
This opens up a dropdown menu, which if you've read through the previous section looks familiar.
The rest of the steps to create the filter remain the same as in the previous section.
Actions that can be performed using Gmail filters
Here's a quick run-down of all of the actions that you can perform with Gmail filters:
- Skip the inbox: Archive an email so that it doesn't appear in your inbox.
- Mark as read: As the name suggests, have an incoming email already marked as 'read.'
- Star it: Have Gmail mark the email as starred.
- Apply a label: Add a specific Gmail label to an email.
- Forward it to: Automatically forward an email to another email address.
- Delete it: Send an email to the trash.
- Never send it to Spam: Tell Gmail to never send a specific set of emails to Spam.
- Always mark it as important: Automatically mark a specific set of emails as important.
- Never mark it as important: Tell Gmail to never mark filtered emails as important.
- Categorize as: If you use multiple categories of inboxes such as Primary, Social, Updates, etc., tell Gmail to automatically add a specific set of emails under a category.
Editing or deleting filters
To edit or delete a filter, follow the same set of steps as above, ie. gear icon→settings→filters and blocked addresses.
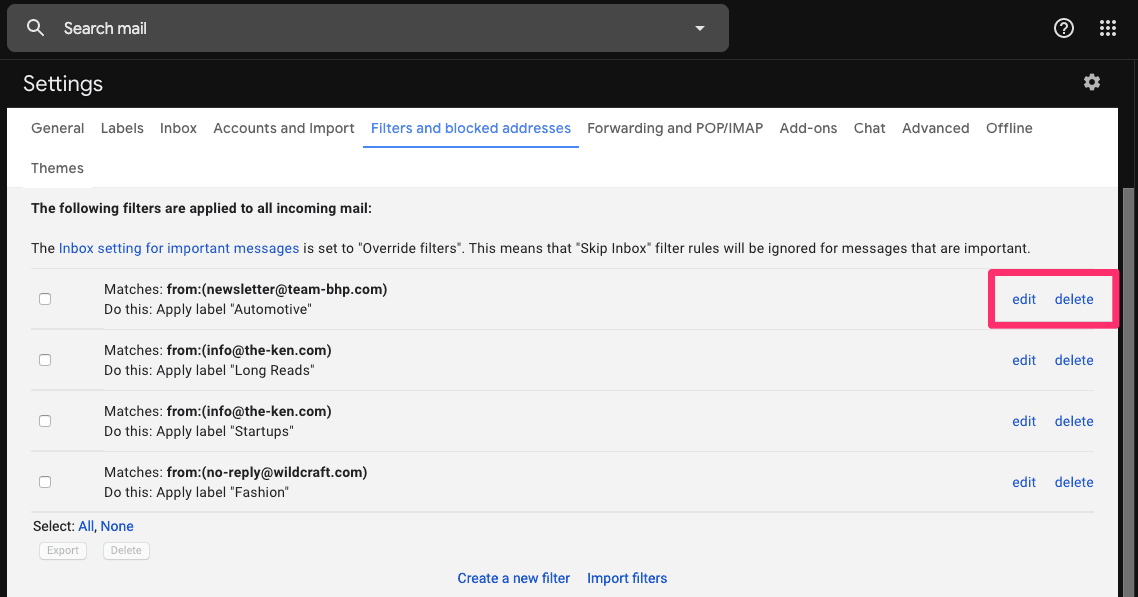
This now shows you a list of all your existing Gmail filters. In addition to this, next to each filter, you see an option to either edit the filter or to delete it.
Clicking on 'edit' opens up a dropdown menu which allows you to refine your filter conditions.
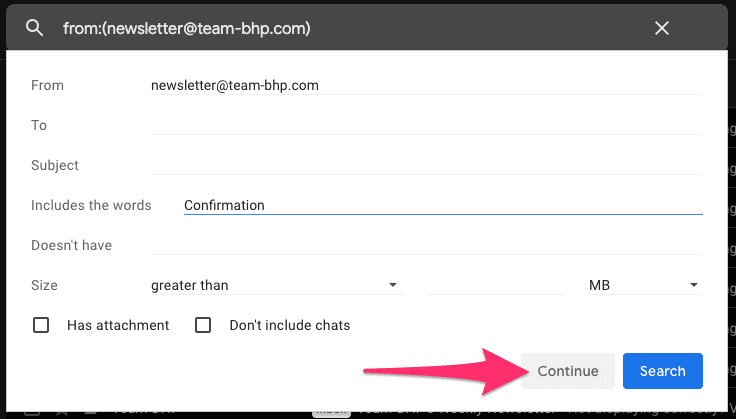
For instance, I've now modified the filter and added a condition to filter emails containing the keyword 'Confirmation.' Clicking on 'Continue' takes you to the next dropdown which then allows you to modify the actions you want the filter to take.
For instance, in this case, the filter was used to add a label to an email. I'm now using it to also send emails that contain a particular keyword to the trash.
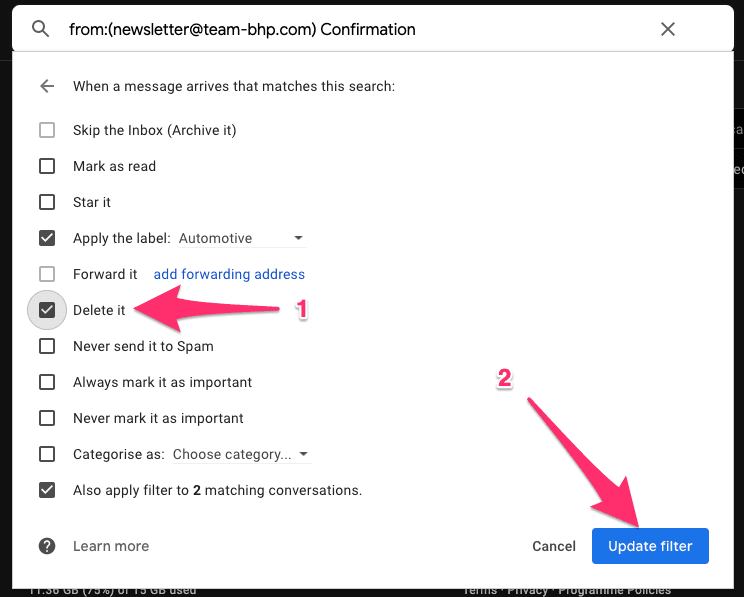
Clicking on 'Update filter' edits the filter conditions.
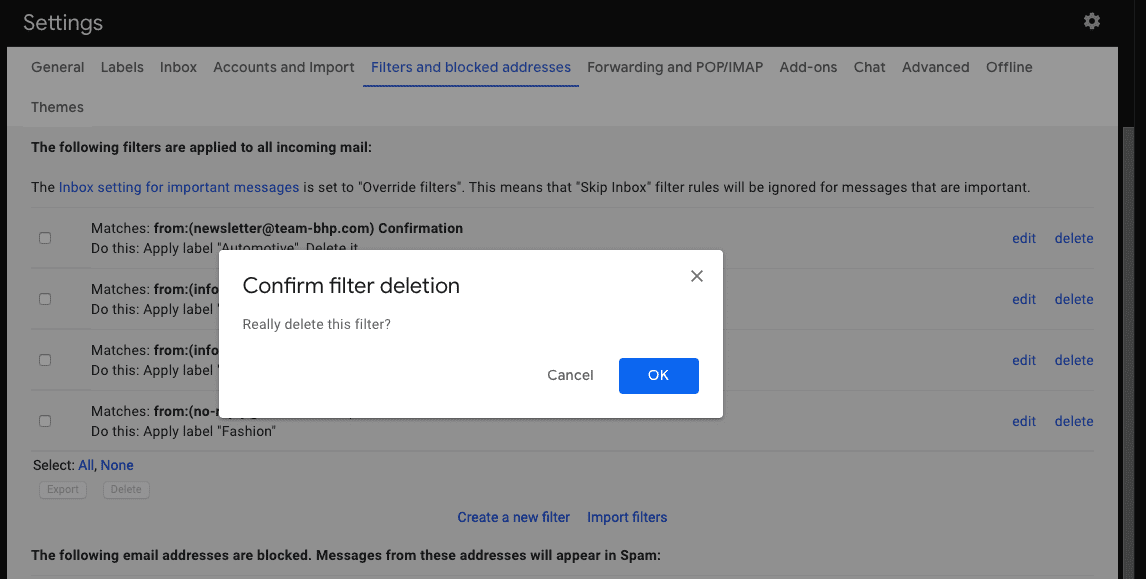
Deleting a filter is simple. Simply click on the 'delete' option next to the filter you wish to delete, confirm that you wish to delete the filter you have selected and you're all done.
Pro-tip: Gmail allows you to take bulk actions on filters. Use the checkboxes on the left-hand side columns of the filters and choose one, many, or all of the filters.
Advanced filter actions
By now you're probably an expert on creating and editing Gmail filters and you're now ready to take things to the next level.
Import/Export filters
By now you're probably an expert on creating and editing Gmail filters and you're now ready to take things to the next level.
If you've set up a number of email filters on one Gmail account and you want to use the same set of filters on another Gmail account, you can accomplish this by using the import/export filter options.
To export a filter, let's revisit some of the steps we've followed in the previous section — gear icon→settings→filters and blocked addresses.
Now use the checkboxes to select filter(s) and click on the 'export' option.
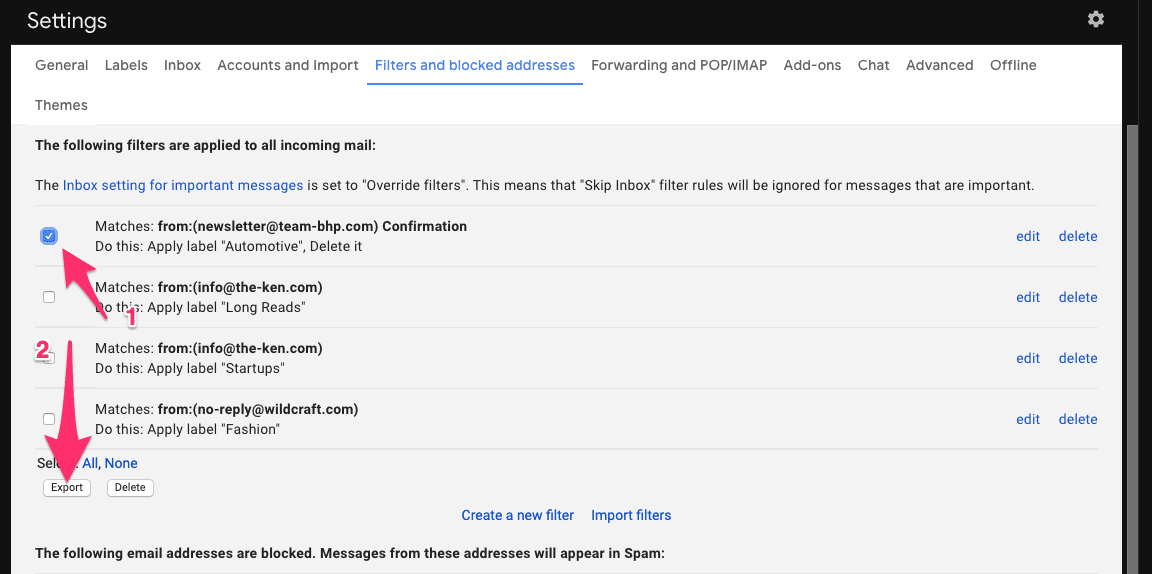
Clicking on 'export' generates an XML file.
This XML file can then be edited via a text editor or saved and imported into another Gmail account in order to replicate the filter setup.
To import a filter, once again use the gear icon→settings→filters and blocked addresses path to get to the list of all your existing Gmail filters.
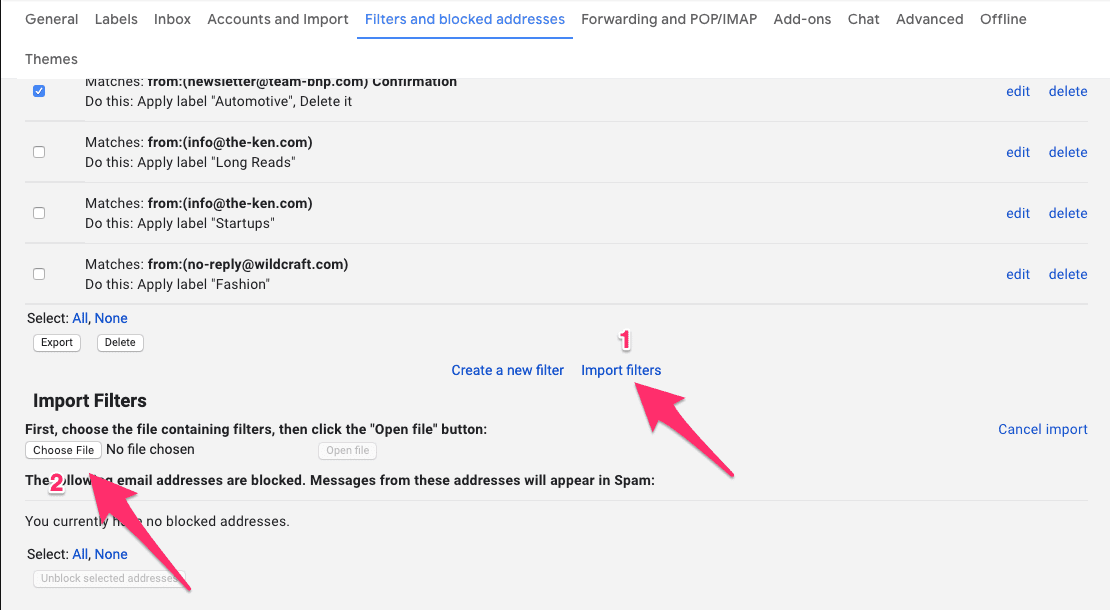
Click on the 'import filter' option, then upload your XML file.
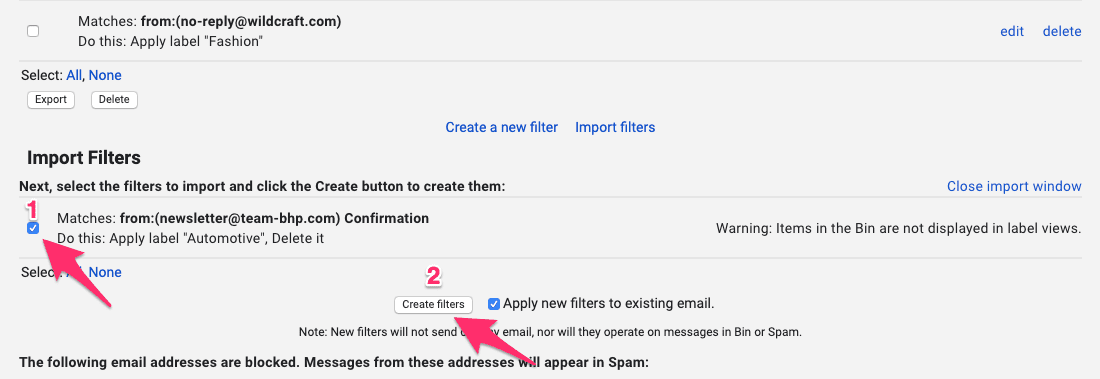
Now click on the checkbox next to the imported filter and use the create filter option to start using the newly imported filters.
Precise filters with operators
Gmail supports several operators which allow you to perform precise search operations. These searches can then be saved as powerful and precise filters. Here's a quick run-down of the operators that are supported by Gmail and their functions.
- AND: By default, Google combines all search terms with an invisible AND operator.
- Example, searching for Dunder Mifflin finds all emails containing the words Dunder and Mifflin.
- OR: Finds emails containing at least one of two terms or expressions.
- Example, searching for Dunder OR Mifflin finds all emails which contain either the term Dunder or the term Mifflin.
- "" (double inverted commas): Searches for phrases (not case sensitive).
- Example, searching for "The worst thing about prison was the dementors" finds all emails which contain the exact same phrase.
- + (Plus sign): Searches for a term exactly as typed.
- Example, +dwights finds all emails containing the term "dwights" but not containing the term "dwight".
- – (Minus sign): Searches for emails that do not contain a specific term.
- Example, -dwight finds all emails without the term "dwight" in them.
- () (Parenthesis): Searches for terms as a group.
- Example, subject: (Pam Beesly) searches for all emails that have the words "Pam" and "Beesly" somewhere in the subject line but not necessarily as a phrase.
Source
Congratulations! You've graduated from the Gmail filter school. Now on to some must-have Gmail filters to achieve inbox nirvana.
Must-have Gmail filters
Auto-delete unwanted emails
Preventing emails from reaching your inbox is a hundred times better than having to deal with them once they enter your inbox. You can always use Gmail's block button or even a smart tool like unroll.me
But sometimes you come across spam email senders that don't honor your unsubscribe requests or senders you can't block even if you'd like to. Or maybe you find pesky emails that get past your spam filters and end up in your inbox.
One way to get around those is by using a filter. You can:
- Create a filter based on the sender's email address and then,
- Instruct Gmail to delete those emails.
Mark emails as read
All emails are equal, but some are more equal than others. This is why it is important to mark these less important emails as 'read' so that you can focus on the ones that really matter.
Once again, you can:
- Create a filter based on the sender's email address or keywords and then
- Instruct Gmail to 'mark as read.'
Move emails to specific categories
If you aren't using Gmail's tabbed inboxes, you probably should. Tabbed inboxes allow you to segregate your inbox into tabs such as Primary, Social, Updates, etc., allowing you to focus on emails that matter.
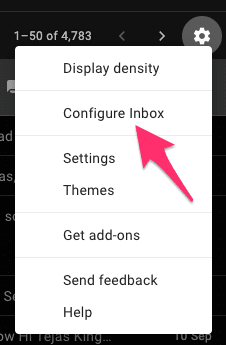
To enable tabbed inboxes, click on the 'gear icon' on the top right corner of your Gmail window and click on 'Configure inbox' from the dropdown.
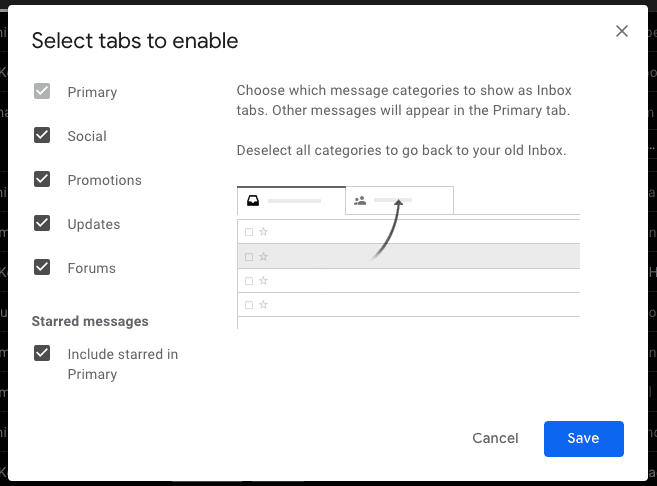
Now click on the tabs you want to enable and hit save.
In order to do that, you can:
- Create a filter based on the sender's email address or keywords and then,
- Choose the filter action, 'Categorize as' and have Gmail move the filtered emails under a specific tab in your inbox.
Automatically add labels to emails
We've already spoken about how Gmail labels are a powerful tool to organize your inbox. You can read more about it here. You can use filters to automate label creation so that you can mark certain emails as important, or for follow-ups, etc.
To automate label creation:
- Create a filter based on the sender's email address or keywords and then,
- Use the 'Apply a label' and pick a label from the dropdown menu.
Automatically empty your Spam inbox
Are you tired of manually deleting emails from your Spam inbox on a periodic basis? You can create a filter to automatically delete every email that Gmail sends to your Spam inbox.
To do this,
- Go to the Gmail search bar and click on the gray triangle.
- In the dropdown, navigate to the "Has the words" field and type in is:spam.
- Click on the "Create filter" button.
- Use the "Delete it" filter action and confirm filter creation.
Wrap up
Giving up on email is not an option. Using Gmail filters in the right way is probably best that you can do to cut through the noise.

Tejas Kinger is a Product Marketing Manager at Hiver. Passionate about tech, startups, and all things SaaS. Say hello on Twitter (@TejasKinger).
How To Make A Blog In Gmail
Source: https://hiverhq.com/blog/gmail-filters
Posted by: reidgropen.blogspot.com
0 Response to "How To Make A Blog In Gmail"
Post a Comment